

Blur edge images with GIMP
Starting from a photo or a drawing in your library, you want to create a vignette or a logo whose contours are blurred in order to integrate it into a Web page.
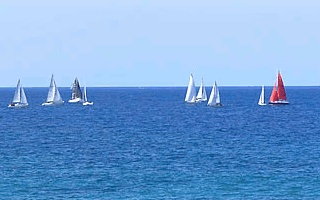
The image shown is a navy picture of 320 x 200 pixels, a personal shoot.
 |
-> |  |
There is a simple way to blur the edges of an image, using the airbrush, taking for color the background color. But for a more precise rendering, you must either use a filter or tap into the resources of GIMP and play with layers and masks...
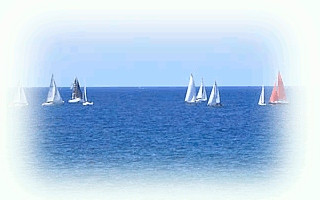
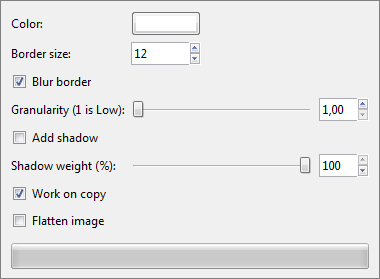
The simplest method : To apply a border filter
| Command | Dialogue or image |
|---|---|
Switch to RGB: Image -> Mode -> RGB |
|
The granularity adds waves to the edge, but with the minimum value it will be straight as in our demo. |
 |
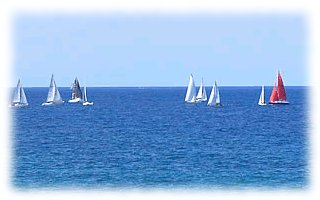
This method is simple and fast, perfect when we want to create a rectangular outline. |
 |
To choose the shape of the contour, another method becomes necessary.
Method for a choosen shape
This achievement requires fifteen steps. It is easy to miss one, do not be discouraged.
| Command and purpose | Layers or Dialogue | Image | |
|---|---|---|---|
Click on File/Open to load the image to transform into artistic vignette. Set it in RGB mode (Image/Mode). |
|
||
| Click on the background color to set, in our example it is white. | 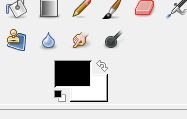 |
||
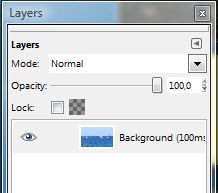
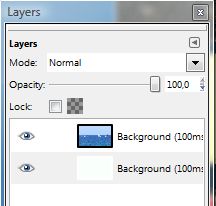
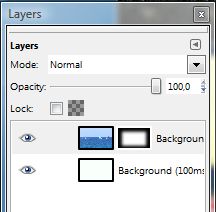
CTRL L Open the Layers dialogue. You see a single layer, our image. |
 |
||
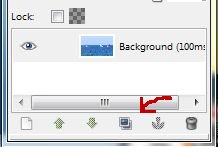
CLICK on this layer. Click at bottom on the duplicate button. |
 |
||
| A second layer appears in the dialog box, above the previous one. | 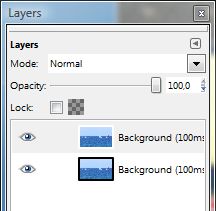 |
||
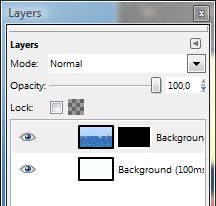
CLICK on the second layer, corresponding to the background image. CTRL A to select the entire image. CTRL . (dot) to fill the layer with the background color. |
 |
|
|
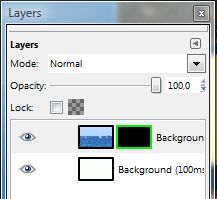
LEFT CLICK on the top layer. RIGHT CLICK on it and in the Select menu on Add a layer mask. Select Black (full transparency). A black image appears on the right and our photo is white now. |
 |
|
|
ALT + CLICK on the layer mask (click with the alt button pressed). The image becomes black. |
 |
|
|
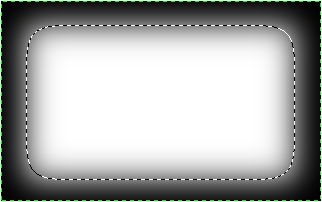
CTRL SHIFT A to clear any selection (we selected the whole picture previously). Select a portion of the image: rectangle, ellipse or lasso according to the desired effect. |
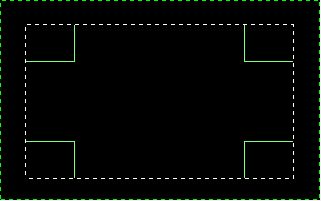 |
||
Over the image, click the right button and then click Select/Feather. Enter the value 50 and click OK (it is the width of the shaded part). CTRL . (dot) to fill with the background color, defined at the outset. The image is blurred and the mask layer as well. |
 |
 |
|
ALT CLICK on the layer mask to display the final image (Alt key pressed). Merge down the layer. In the File menu, go to Save As ... to save the image under a new name. |
|
In case of problem:
- Verify that the image is in RGB mode.
- Use CTRL Z (undo) to clear the last operation.
- It is possible that you do not succeed the first time. Omitting a step can easily happen in the process. Be patient and... try again.
See also: Transparent fuzzy border.