

Creating a XAML Project with Expression Blend
Expression Blend is a development tool dedicated to WPF and XAML and that allow to build Web applications too.
Creating a new project
- In the File menu, clic on New Project...
A dialog box appears, it is shown below. - In the dialog box, select the WPF Application icon for building an executable program (.exe) or W¨F Control Library for building a library to link to other programs.
- Below, in the Name field, type the name of your new project.
- You have also a list of programming language to choose, select one (C#
or Visual Basic).
- Then click on OK.
 .
.
Creating a new document
Once you have created a project, you can add some components. Take note you have at start a Window already created, in the file window1.xaml, and that you do not need to create one.
- In the File menu, clic on New Item, then you can choose between several options:
- Window: Add a window or a dialog box to the project.
- UserControl: Define a graphical component to complete the graphical user interface.
- Page: This page will hold code you can access with a file manager, a browser or any other program.
- Resource Dictionary: Produce a resource to use from other components of the project.
- In the Name field, type the name of the document or keep the default name.
- Thick the Include case if you want to generate code into a file, for the created document.
Now you are ready to create you first program as a binary application.
First Program with Expression Blend
Once the project created, making a first program with Expression Blend is of a disconcerting facility.
The main window of the tool has two side vertical tags, Design and XAML.
- Design displays the visual mode in which one places graphic components and
then one modifies the properties, while
- XAML displays the corresponding source code.
Go to the XAML panel, the following code has been automatically generated with the project:
<Window
  xmlns="http://schemas.microsoft.com/winfx/2006/xaml/presentation"
  xmlns:x="http://schemas.microsoft.com/winfx/2006/xaml"
  x:Class="UntitledProject1.Window1"
  x:Name="Window"
  Title="Window1"
  Width="640" Height="480">
   <Grid x:Name="LayoutRoot"/>
</Windows>
If you already have read the chapter First XAML program in the Silverlight tutorial, you will note that here the top container is a window and not a canvas, as it is the case for a Web page.
In addition, the contents is included into an empty Grid tag:
<Grid x:Name="LayoutRoot"/>
It is in this tag where we will put out code, it thus has to be opened:
<Grid x:Name="LayoutRoot">

</Grid>
Let us take again the code which we used in the previous chapter and place it into the container:
<Grid x:Name="LayoutRoot">
    <TextBlock
       FontFamily="Verdana"
       FontSize="30" >
           Hello World!
    </TextBlock>
</Grid>
The code is saved with both the Ctrl and S keys pressed, which causes a syntax
check of our code.
Our first program is finished! It remains to compile it.
To build the program, open the Project menu and click on the first command:
Build Project. Check that there is no error message in the window at bottom.
If the following message is displayed, all is perfect:
Build completed
To launch our program, click on the last line of the same menu: Test project.
You should get the following window:
The binary executable program (.exe) is stored in the sub-directory bin\Debug, in the directory of your project.
Accessing C Sharp code
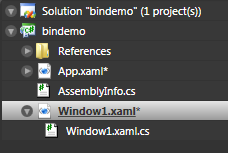
When you create an XAML project with Expression Blend, it generates a C# file associated with this item. To see it, click on the icon to the left of the XAML filename:
To access the C Sharp
code, it is necessary to have installed Visual Studio Express at least. You
can then click on Windows1.xaml.cs to enter the code editor.
A namespace is there
which is the name of the project, it is the space of your application.
It also contains a
class of Window type, it is the main Windows of your application.
More