

Using GitHub on Windows
How to upload a project when you program on Windows. Experience.
GitHub is now the the most popular project hosting site thanks to the facilities offered to allow contributions to the code. This is not the only free host for shared projects based on Git, initially created for Linux, but it is here that are available online most projects.
It was difficult some time ago to use GitHub with a local station on Windows, but it is now a bygone era, and if you know exactly what to do, creating a repository and sending the code became very easy.
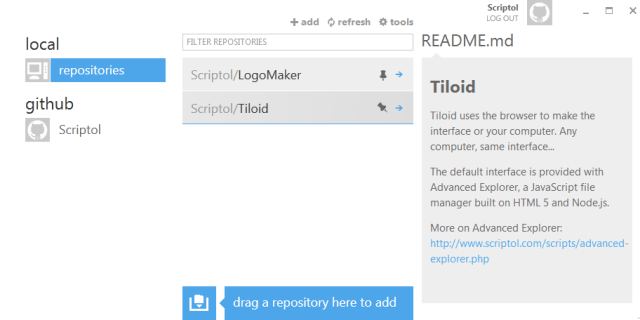
Since February 2016, once the project created, it is possible to put the files online directly from the browser, through drag and drop. But this suits to load just a few files, to update a project when several files have been modified, deleted, added, synchronization tools are essential.
Everything is done in three stages ...
1) Create an account
Go to github.org and create an account. You can also create a "repository" with the name of your project, but this is not necessary.
2) Create the project
We assume that the code is already written, and it is in the directory "myproject."
Download the GUI software GitHub for Windows. This software will take care of transforming your directory containing your source code to a Git project ready to upload.
Enter the name of your account on GitHub and password. These data are stored and whenever you launch the progamme, you are automatically connected.
As shown below, the interface offers to drag/drop the folder containing your sources ...
That's all you have to do to create the project. This once accomplished, I recommend to forgive this software. It could also theoretically send the files online, but it never works and we never know why.
Before continuing, you must also go into your project directory and delete the file .gitignore automatically generated, because it could contain limitations which do not correspond to your list of files.
3) Put the code online in the repository
To put the code online, the Git Shell command line is the best tool. This is a Powershell window created by the same program for Windows.
So open the Git Shell, and enter the directory of your project. Then, the following line appears:
c:\myproject [master]>
By default, your project is the main branch. We will not discuss the creation of multiple branches in this article.
To send the code the first time:
git add .
git commit -m "infos"
git push origin master
Replace "info" by the text you want to display on the GitHub site to describe the "commit", ie the version.
Check on the GitHub website if the project is created and the list of files therein.
To remove files:
Delete the files in the local project directory and type:
git add -u
git commit -m "Update"
git push origin master
Replace "Update" by the informative text of your choice.
To add files or replace existing files:
git add -A
git commit -m "Update"
git push origin master
These commands are enough to create an online image of the project and update it after each change of the source code.
After verifying in the repository that all files are present and necessary for the project, you can still add a specific file, use the command:
git add filename
and:
git rm filename
to remove one ...
Another tool
There is also TortoiseGit that fulfills most of the functions required to manage an open source repository. Here the commands are integrated into the shell.
Ungit