

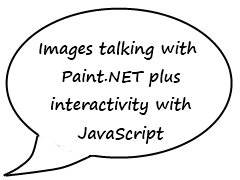
Comic Bubbles with Paint.NET
We will make images more expressive by adding speech bubbles.
It is quite simple to do with Paint.NET. But a more interesting effect be produced if the bubbles appear after a user action.
1) Adding a speech bubble on a picture
The simple method
- With the rounded rectangle or ellipse tool, draw a figure with a black border.
- Fill in to blank.
- With the line tool, draw an angle. Use the brush and white color to unite this angle with the bubble.
Or, trace other smaller bubbles to express the thoughts of the character. - With the text tool, add content to be resized to fit the size of the bubble.
Choose a font

Some policies are better suited for this type of text:
- Comic Sans MS.
- Kristen ITC.
- Lucida Handwriting.
- Segoe Print.
- Papyrus.
- Bradley Hand ITC.
- MV Boli.
These are the default fonts of Windows. On the Web may be found specialized fonts to download such as Balloon, etc..
A more sophisticated method
Using layers will allow adjust the bubble around the text without destroying the original image.
- Open the layer window if it is not already opened (Window -> Layers or F7).
- Add a new layer by clicking the green "+" at bottom.
- Add another layer.
Needless to rename or change the properties. - In the first layer, type the text.
- Go to the second layer. Add an oval or rectangle around the text and adjust its size.
- Add tail or small bubbles as described above.
- Fill with white or the color of your choice.
- Click on the first layer. Merge (Layers -> Merge).
- Merge the second layer in turn.
- Save the image.
Using predefined bubbles
The principle is to add a font to the system, whose letters are bubbles of different shapes.
Instead of drawing a bubble in the second layer, switches to text and include a letter-bubble that is positioned and resized under the first layer containing the text.
2 Add interactivity
We want the user to make the bubble appear by clicking on an image. The script of the mystery image on Xul.fr will be adapted for the occasion.
The principle is to superimpose two images, the initial image under the image that is changed with the bubble, or if one prefers the second layer only transformed into an image with a transparent background.
The second picture with the bubble is made invisible by its CSS style. It is made visible when the user clicks on it and so hide the original image.
The code to insert is as follows:
<div class="bbox" style="width:360px;height:360px" onClick="showPic('over')">
    <span id="over" class="over">
        <img src="over.jpg" width="360" height="360">
    </span>
    <span id="under" class="under">
        <img src="under.jpg" width="360" height="360">
    </span>
</div>
The CSS and JavaScript are explained in the article already cited.
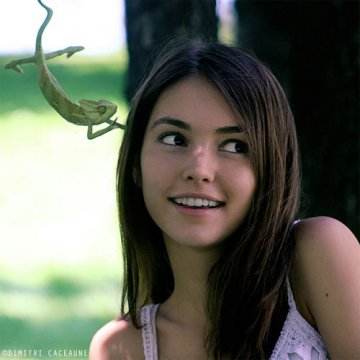
Demonstration: Comic Bubble with Paint.NET
More interactivity...
Click on the image to let a comic bubble appears...

See also...