

How to replace the sky on a photo
With Gimp or Photoshop make the sky bluer or darker on an image...
Changing the sky is an operation that is as easy with Gimp as with Photoshop. The latter has, of course, a "blending" command which would offer a simpler way to do it, but which rarely works in this case, and we must therefore use clipping as with Gimp. The operations are then similar.
1) Load the photo to improve and load a photo of the sky
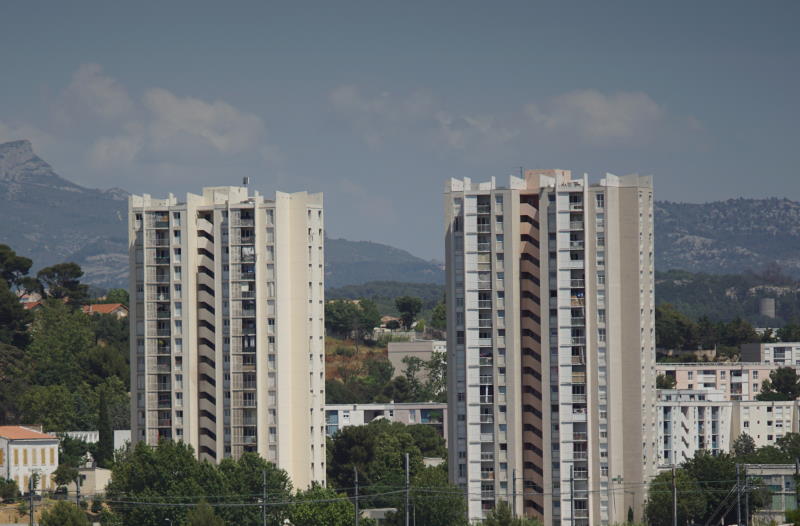
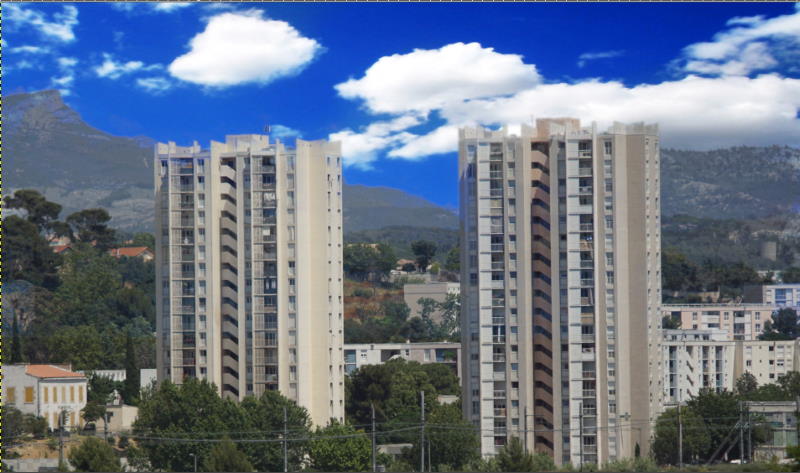
The image below will serve as an example.
If you have not had the opportunity to take pictures of the sky before, you can recover the part of an image that has a sky suitable for the operation.
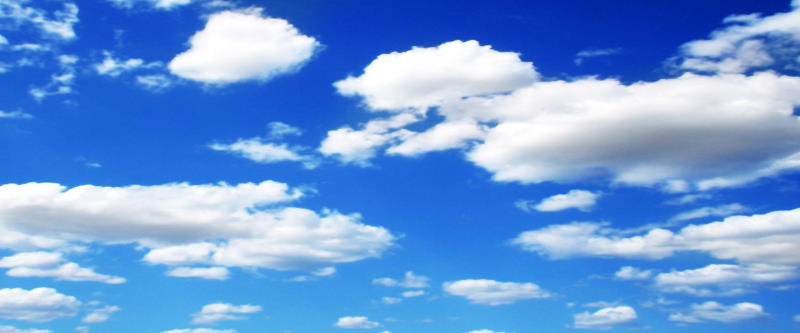
For example, this image of the most flamboyant blue will be used:
If necessary, the image of the sky will be resized so that it has the same width as the image to be modified. The height must cover that of the sky in the photo.
2) Separate the sky from the ground
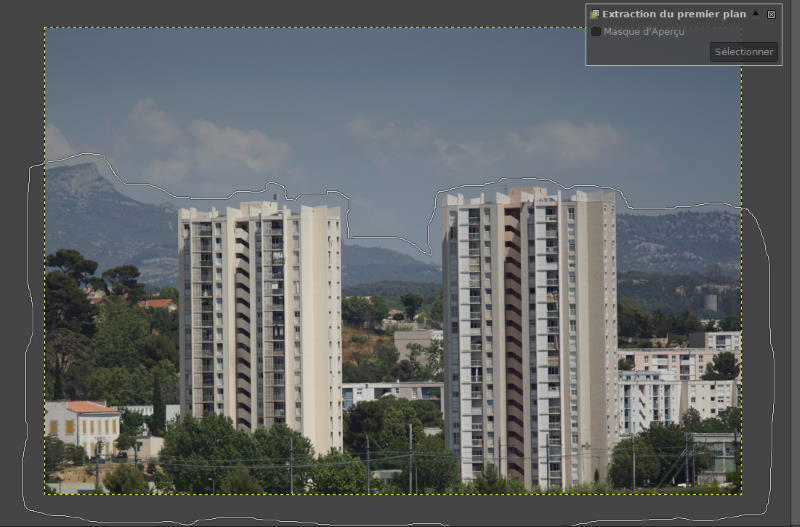
The tool "Foreground select tool " is what it takes to carry out a trimming the most easily. We surround the part of the photo to keep and can freely overflow the frame of the image as seen below...
3) Use the brush to tell the software what you want to keep
After circling the landscape, press the "Enter" key on the keyboard. The part out of the selection becomes blue.
Without changing tools, draw a line within the selection to help the software know what needs to be kept. When you release the brush, this operation is complete.
You can restart it again if the result does not satisfy you.
Click on the "Select" button in the window that pops up when you select the foreground extraction tool. The border of the image appears dotted with generally also holes in the selection!
4) Remove holes
Unfortunately, you notice that there are areas surrounded by the dotted line inside your landscape. To eliminate them, click in the "Selection" menu on "Remove Holes". You will now have a clear border between the ground and the sky.
5) Suppress the sky
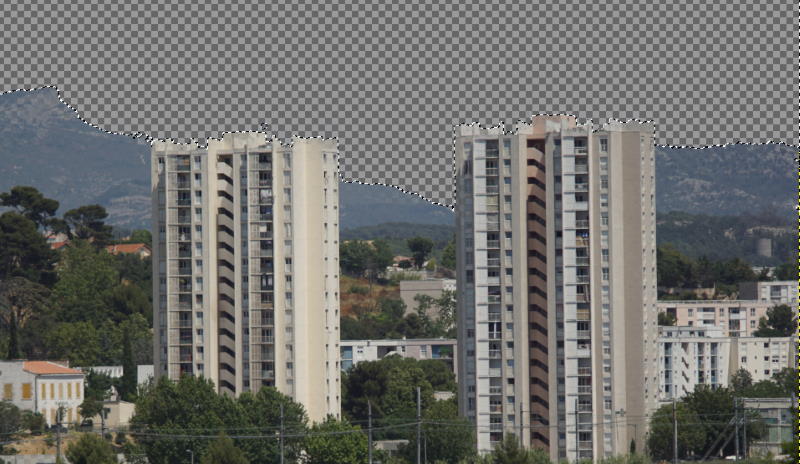
Since you have selected the ground, click in the "Selection" menu on "Invert Selection" to select the sky instead. Then press the "Delete" key on the keyboard to erase it. The area he occupied becomes transparent.
6) Add the new sky
Add a new layer in the layers window. Copy and paste the sky image that you have already loaded (otherwise you can do it now) into this layer.
Click on the layer of the photo and move it to the foreground by clicking on the red arrow. You now see the sky appear in the transparent area.
If pieces of the original sky appear inside the image, perform steps 2 and 4 on those parts of the image, and delete the selected areas to make the new sky appears instead.
Merge down the sky layers and save the image.
This picture would need a little more contrast and color enhancement, to better match with this new flamboyant sky. For your own images, you will find these functions in the "Colors" menu with the "Brightness-Contrast" command and "Auto", "Color Enhance" command.
See also ...