

Transparent fuzzy border
To inlay an image onto another, it must have a transparent background, and more preferably a blur edge to get a result like this:
 |
+ |  |
= |  |
Making a blurred contour to an image is easy with the "Fuzzy border" filter, but for the transparent background, some additional steps are required.
Load the image that should have a blur edge. Check in Image -> Mode is it in RGB mode. |
|
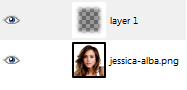
Click on the image in the Layers panel. Click "Add alpha channel" to add a channel. If the option is grayed out, the image already has a channel, do nothing, or better yet, remove it and add it again. |
|
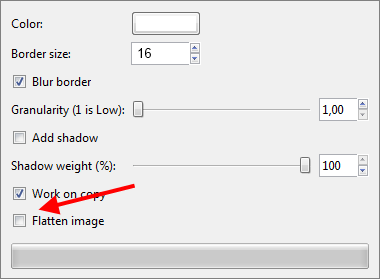
Click on Filters -> Decor -> Fuzzy border. A border thickness of 16 is suitable for the size of our image. Check the option "Flatten image" is disabled. |
 |
This creates a layer above that of the female face with a white blur edge.
|
 |
Click on the new layer on top and then in the contextual menu click on "Alpha to selection". You get a modified image in the main window.
|
 |
Delete the top layer. |
|
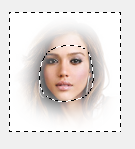
Now you get the image of a female face with a fuzzy border and a transparent background. |
|
I recommend exporting the image in PNG format. |
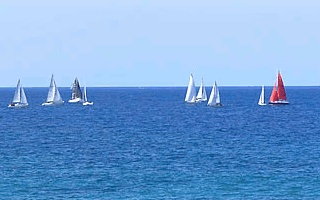
The inlaying is a simple action. Simply load two images, copy that one that has an tranparent blur edge with CTRL-C and paste it into the other with CTRL-V.
In our example, we get a resulting picture recalling Jessica Alba in the movie Into the Blue. The result is certainly perfectible, a blue background in the image of the woman's face, for example, would give a better result, but I think you have understood the principle.